Informatica PowerCenter 的安装2024 年 11 月 13 日 | 阅读 3 分钟 Informatica 是一款强大的 ETL 工具,用于各种规模的市场业务的数据集成。 Informatica 版本在 Informatica 中,最新版本是 Informatica 10.1.1,之前著名的 Informatica 版本有 9.6、9.5、9.1、9.0、8.6、8.1、8.0、7.1、6.0 和 5.0。
由于 PowerCenter 的新云版本,以上所有版本都已过时。 PowerCenter Express ETLPowerCenter Express 是一款 ETL 工具,用于 Informatica 市场领先的数据集成。 在小型项目中,它用于正确大小的内联数据分析。 Informatica 安装要下载并安装 Informatica PowerCenter,请点击给定的链接。 https://edelivery.oracle.com/osdc/faces/Home.jspx 让我们看看如何逐步安装 Informatica PowerCenter,例如 步骤 1:点击上述链接并下载 Informatica PowerCenter 8.6.1 版本。 步骤 2:在 stage 目录 (D:\INFRA) 中解压缩。 步骤 3:解压缩文件后,转到 Server\windows\Desktop\Download\VM. 步骤 4:双击 install.exe 文件名,它将打开一个对话框。 步骤 5:点击 运行 按钮。  步骤 6:点击按钮后,它开始安装 Informatica PowerCenter。  步骤 7:然后选择要安装的语言,然后点击 确定 按钮。  步骤 8:现在点击 下一步 按钮。  步骤 9:选择 Informatica 安装类型,然后点击 下一步 按钮。  步骤 10:浏览许可证密钥文件,然后点击 下一步 按钮。 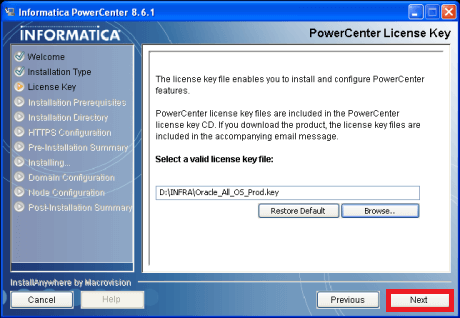 步骤 11:浏览安装先决条件,然后点击 下一步 按钮。  步骤 12:浏览安装目录并选择安装目录。  步骤 13:浏览 HTTPS 配置并设置默认值。  步骤 14:浏览预安装摘要,然后点击安装 Informatica 按钮。  步骤 15:安装 PowerCenter 8.6.1。 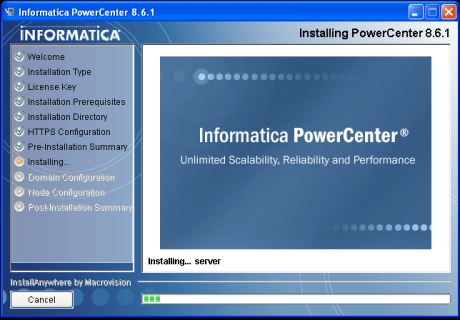 步骤 16:选择创建新域,然后点击 下一步 按钮。  步骤 17:浏览配置域数据库 Informatica,然后点击测试连接按钮。  步骤 18:现在,测试连接通过。  步骤 19:浏览域配置,然后点击下一步按钮。  步骤 20:安装 Informatica PowerCenter 服务器并等待。  步骤 21:配置 Informatica 服务,取消选中“在不同的用户帐户下运行 Informatica 服务”,然后点击下一步按钮。 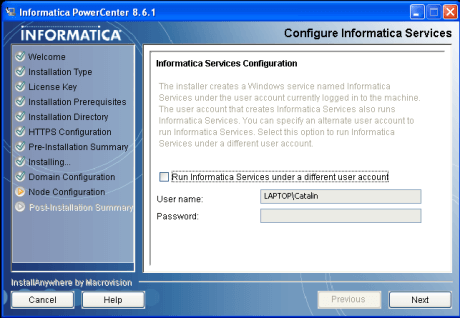 步骤 22:选择安装后摘要。  如何在 Informatica Cloud PowerExpress 上注册Informatica 提供 Informatica 云的 30 天免费试用。 对于 30 天免费试用,请在给定的链接上注册自己。 https://www.informatica.com/products/cloud-integration/cloud-data-integration.html 让我们看看如何逐步在 Informatica Cloud PowerExpress 上注册,例如 步骤 1:打开以下链接 (点击)。 步骤 2:然后点击免费 30 天试用按钮。  步骤 3:填写以下表格或填写详细信息,然后点击 开始您的免费试用 按钮。  步骤 4:然后我们将收到确认页面,如下所示。 打开电子邮件帐户并单击确认链接。  步骤 5:单击确认 URL 后,设置密码和一个安全问题。  步骤 6:然后输入数据后点击确定按钮。  步骤 7:我们现在就在 Informatica 云中,我们可以将其用于新项目。  下一个主题Informatica 中的映射 |
我们请求您订阅我们的新闻通讯以获取最新更新。
我们提供所有技术(如 Java 教程、Android、Java 框架)的教程和面试问题
G-13, 2nd Floor, Sec-3, Noida, UP, 201301, India
